Friday, July 29, 2005

Bubble Bag


Image hosted by Photobucket.com


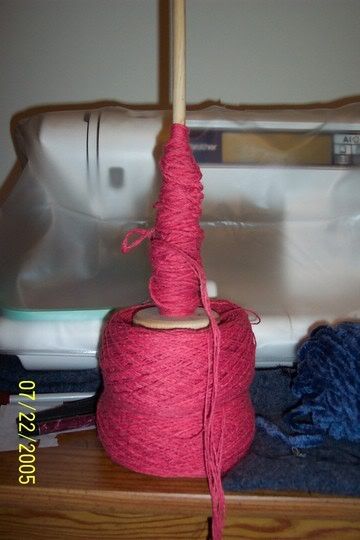
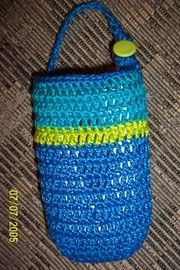
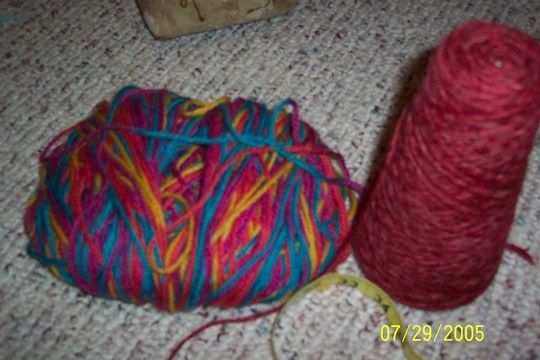
Janet inspired me to make the Vintage Bubble Bag from Pursenalities. I used the above pictured yarns. Plymouth Outback 100% wool and the cone yarn which I belive is Brown Sheep. I'm not sure of the colorway for either because my lables are long gone. This is my leftovers. My sister's first bubble bag was the same color of Plymouth Outback so I used her leftovers first, then added mine. I made the pattern about 30% larger than the instructions called for by increasing the number of stitches and rows. I wanted a larger bag. I started this late late on Wednesday night after I used all of the sari silk I had on the other bag that I'm making. I have some more silk coming via the mail so as soon as it arrives I'll be working on that bag again! Hopefully it will be tomorrow.

Image hosted by Photobucket.com
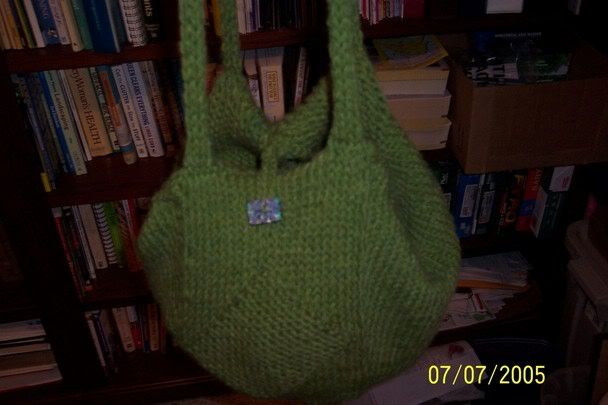
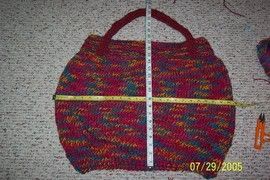
Here's the bag after I finished knitting it and sewing on the handles but before washing it. I don't know why some of my pictures come out so small, but normally it's the ones like this one where I really want to demonstrate size! UGGGG, since you can't read it, the measure tapes are measuring about 23 inches in both directions. So far I'm pleased with the ease of the pattern and design and the look of the bag. Now to get to fulling!

After 2 cycles in my front loader,some delicate wash, baking soda and 3 kettles of boiling water voila!
Image hosted by Photobucket.com 
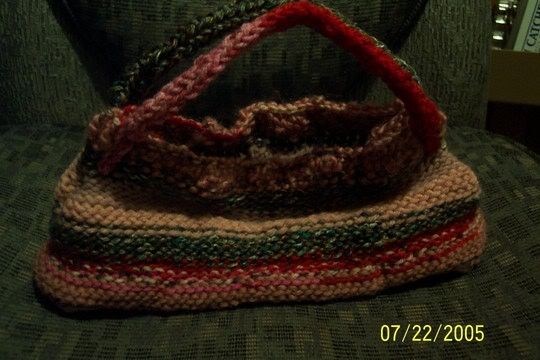
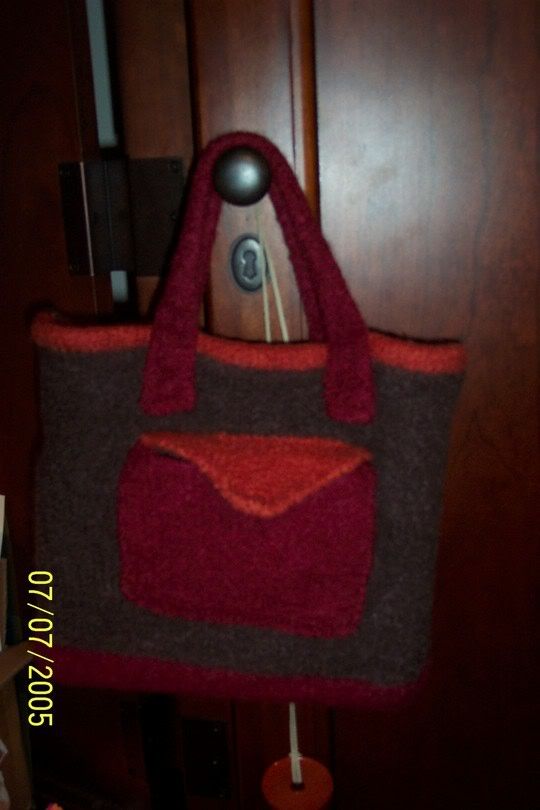
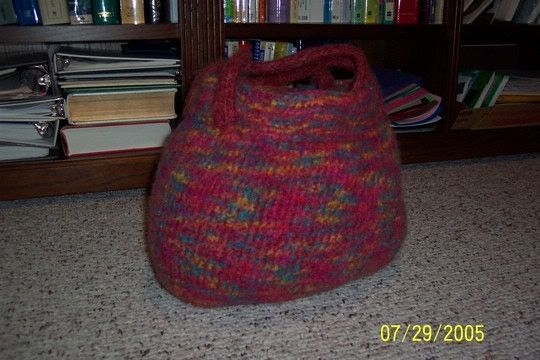
Here's my finished bag, stuffed with a superwash wool blanket and still damp. I like how the colors of the yarn worked together and the overall shape of the bag. I cannot wait for it to finish drying so that I can use it!
It measures 29.75" around it's widest point and 10" from base to rim. The handles stretched a little because I was pulling and shaping the bag with the heavy blanket inside, LOL they measure 27" now but started out being 20" before felting. I may toss this into the dryer with the blanket inside of it to dry it quick and let it full a little more around the blanket.
The cycle in the dryer did exactly what I wanted it too. It dried the bag and shrunk the handles and removed the little disortion I had from stretching the bag by hand! It is finished!

Thursday, July 28, 2005

happy birthday Janet


Image hosted by Photobucket.com

Today is my sister's birthday and I made her this swarovski crystal and sterling silver mother's bracelet. I'm really loving making jewelery!

Tuesday, July 26, 2005

Houserwares


Image hosted by Photobucket.com


I needed some things for the kitchen of our travel trailer so I decided to knit and crochet them.  I have three hotpads.  Two are crocheted and double thickness and one is knitted with 2 strands held together once again for added thickness.  The tiny one is for pulling things from the microwave, not the stove.  And two dish cloths knitted with a crochet border.  They are diamond shaped.  I will need to make some dish towels too and possibly some other accessories but here's the start.

Friday, July 22, 2005

scrappy bag


Image hosted by Photobucket.com


I had some of my scrap yarn left over from the skirt that I made earlier this month and decided it was enough for a little coordinating bag.  I knitted it myself freehand, my own pattern.  It's a little bag just for my wallet and cel phone and a few other needs like lipgloss and tylenol.  Oh yeah, it would also hold some keys.  I am still deciding as to whether or not I'll line it.  It's not super sturdy since it's not felted so I probably will need to.  It's a good scale for the skirt.

some spinning


Image hosted by Photobucket.com


I had no roving :( so but I wanted to experiment with my spindle so I tried my hand at spinning some 2 ply weaving cotton together.  I spun 4 strands of the 2 ply together and produced this which I haven't wrapped it to see how much wpi but it looks like a thick worsted or a thin bulky.  I can already see that this spinning thing takes coordination.  My strands at times are overtwisted, and at other times, under twisted. . . It's kind of fun though so I'll be looking to experiment more when I finish up some other projects!

a closure for Jaime's bag


Image hosted by Photobucket.com


I made a bag for my friend Jaime, but didn't put a closure (see June posts for full view of the bag).  Basically I wasn't sure she'd want one. Well she did want one so today we got together and colaborated on this beatuiful glass pendant as a closure toggle. 

Monday, July 18, 2005

Going for a spin


Image hosted by Photobucket.com


My sis put a bug in my head about spinning my own yarn after she had a run in with some FFF's (fellow fiber finatics) I decided I wanted to try my hand at it but I didn't have any spare cash to buy a hand spindle, so as usual I turned to my trusty internet sources to figure out how to make my own. Luckily for me Hobby Lobby was having a 1/2 off sale on all unfinished wood so one dowl cost $.22 and my whorls were $.49 each. I got a package of picture hanging hardware from the framing department and used the tiny eye hooks with screw ends and used my plier to open it up into a hook. When I mentioned getting out the radial saw to cut the spindles Rocky jumped up and volunteered to cut my dowel down to 3-12" pieces. . . I just pushed the whorl onto the dowl, added a daub of wood glue to make it stay, screwed in my hook and then dremmeled the other end to death until I got a suitable blunt point for resting the spindle on a surface. With babies anything more pointy sounded like a bad idea. As it was Charmie was begging me for the "stick" right after I got home. Lord only knows what he intended to do with it! Maybe I'll pick up another whorl piece and make a top down spindle. I plan to give the top spindle in the picture to my sister so that she can have a whirl herself from time to time.

Tuesday, July 12, 2005

yarn scraps. . . . skirt?


Image hosted by Photobucket.com


On our recent vacation I enjoyed visiting with Rocky's Aunt Patty becasue I really feel as though we have similar likes. . . shopping and yarn! She had this awesome idea and I have to say I copied it. She resourcefully used yarn from her past projects to make these beautifully striped scarves. Each one was unique and so fun looking. I haven't done much with the novelty yarns that she had for her scarves and Actually I don't have much yarn that's in a similar color family, but luckily my sister did and was willing to graciously part with her scraps. We raided her scrap bin for pinks and she gave me some neat yarns that I've never worked with before. After getting them home I found some other yarn scraps from her that went with the theme and the yarn ball above is the result. I cut the scraps into 15 and 20+ foot lengths and tied them together then wound it all into this ball. I was shooting for abut 400 yds. Just seeing the ball was exciting. I could really see how the yarn colors and textures would work together as I wound them up. I have been wanting a knitted skirt and liked the one in The Knitting Experience, The Knit Stitch, knit-round around scarf. I think the fact that they model the scarf in Noro made me see how beautiful it would be in stripes.

Here's the finished product. I'm quite pleased and it passes the Hubby test as well.

Image hosted by Photobucket.com


Thursday, July 07, 2005

Cel phone pocket


Image hosted by Photobucket.com


Right before our trip Rocky and I had to get new cellular phones.  His was malfunctioning and mine was starting to.  He got a leather case for his as he's the one who's phone normally see's the most abuse but I decided I wanted/needed a way to carry it around in a little pouch so I've been playing with the idea of a this pocket.  Last night I got some craft thread and decided to crochet one.  I used a little less than 5-10 yd. skeins and a # 0 steele hook I got on clearance on our vacation.  Had I not had color changes it may have been as little as 4 skeins.  I started with a chain and increased at the corners while crocheting around it building the base of the pocket, and when it got to the right diameter I just continued in the round.  I re attached the main color as trim around the top and a small loop for the strap to snap through.  Then I added the strap,  It is a foundationless dc chain.  I doubled it back onto itself for strength and attached the snap so that I can move it to whatever bag I'm carrying.
Rocky suggested a snap closure but the phone sits pretty securely in the pocket so I don't think one is needed.  I can always add one later though if I need to.

An adventure in jewlery making


Image hosted by Photobucket.com


Here I stand with Aunt's Jan and Liz and Cousin Jackie.  Unfortunately I didn't think to take this picture before Patty and Chris had left for their lake vacation or Patty could have also proudly displayed her transformable necklace to bracelet red coral creation.  We are all wearing necklaces that we made except for Liz who made a bracelet at this bead store called the  Middle Bead.  We originally went into Chelsea MI to try to visit the lys but they were closed for the holiday but across the street the Middle bead was open.  After going in and looking at all of the beautiful beads and jewlery I suggested that we make something to remember the trip by.  The store owner set us up to make bracelets, and after some time of struggling with what to do we all selected our beads and created these unique pieces.  I don't know the content of all of the other's but mine has Mookite stones that look like Chicklets and as the pendant I combined a Cowrie shell and a small woman figurine.  This was really fun and I want to do this again! 


Image hosted by Photobucket.com


Rocky's Aunt Patty had some beautiful felted bags that she had completed when we visited, and then while we were visiting she whipped up another collossal sized elaborate and beatuiful one with all of her wool scraps, arranged in spectrum like  a rainbow.  I'm sad that I ddin't get a picture. 
She advised that my felted bag was not felted enough so when I returned I followed my sister's advice and added boiling water to my front load washer and voila.  This bag felted almost another 50% more from what it was before.  Evidently with a front loader just running it through the cycle it not enough.  It's now about 8" wide and 8.5" tall, the guessett is about 2.5".  It's more purse sized than tote sized.  It may have felted too much, but I like it.  I still need to add a button to the pocket.  For pictures of this bag from when I originally made it check out the February archives.

Knitted Three Way Bag


Image hosted by Photobucket.com


Before we left for vacation my sis let me borrow her Knitter's Dozen Book for bags and I fell in love with this one.  I recycled some wool ease chunky yarn that she had given to me and made this on our trip.  It has a zipper closure as well as the toggle and button.  I'm using it right now as a project bag for my knitting.  I would like to make another one some day with a less fuzzy yarn.