I started another pair yesterday. Here's the first sock. I guess if I get time later today I'll start the mate. This is worsted weight Reynolds' Odyssey 100% Merino wool. Very soft and cuddly. I can tell there's no synthetic stabilizing fiber in this yarn. I used size 5 needles and these knitted up even faster since I had a bigger gauge.
From looking at the ball of yarn I imagined a bigger differentiation in the striping pattern, it's very subtle without flash and at a glance hard to tell there are stripes at all. These will be great jeans socks with these colors.
Other projects in my mind but not yet started. . . camera bag and sock knitting bag. Stay tuned, but not too closely. Knowing my life it may be a while before I get around to them!
Hello, my name is Doreen and I am a stay at home schooling mom. I strive to share God's love with my children while helping them to grow in a nurturing environment. I love to create and craft with fiber arts as well as the gadgets and tools for creating. If you are reading here, come on in and see what we are working on growin'.
Saturday, December 30, 2006
Friday, December 29, 2006
The 13th hour sock
I started this 2nd sock (on the left) yesterday morning at the Dr.'s office. I've been working on it on and off and just finished it up. I took a few breaks here and there, but it's finally done. My first pair of completed knitted socks with heeels. My feet are so happy now!
Time for bed. . . if only I could get to sleep.
Wednesday, December 27, 2006
1st 1/2 of Pink Stripe socks
Here's the first sock knit from the goodies my sister gave me for CHRISTmas! I wil start the mate tomorrow but I am already itching for it to be done! This one is so comfy and I am excited to see how the yarn knits the 2nd sock. This yarn is self striping but I cannot discern a repeat. It appears to be random and I LOVE IT!
This has also peaked my interest in the other yarns to see how they will knit up into socks.
I am looking forward to having several pairs of handknitted socks because they are so freakin' comfortable!
This has also peaked my interest in the other yarns to see how they will knit up into socks.
I am looking forward to having several pairs of handknitted socks because they are so freakin' comfortable!
Charmie Rides!
Here's Charmie riding his dirtbike solo for the first time! He's got on his protective gear and training wheels.
He will gain confidence with time. He's still unsure of his balance, the trottle control and to further complicate things the training wheels are not completely touching the ground to give him a greater turning clearance so he's a little tippy. I'm sure it won't be long and he'll be driving all over the place with daddy following on his 4 wheeler!
neato books
My sister found these neat pop up books for all of the kids, even baby Jada! The author is Robert Sabuda. She first found his books when Janeen saw one on Sharks and other sea creatures. When they epxlored the book they discovered large pop-ups on all of the pages as well as side booklets on every page with 2 popups each! Jason's book is the Jungle book and talk about a nighttime story! Reading this book will definately make the story come a live with it's fantastic almost diarama like cutouts. Baby Jada's book spells out the word CHRISTMAS and has some special thing for each letter of the word. These are really neat, you just have to see them to undrstand what they are, pictures don't do them justice. They are about 2" thick at the spine they have that much folded paper within.
Charmie's book is The Twelve Days of Christmas and the picture at the botom is the last page from his book. It features a lit Christmas tree with the elements of the 12 days displayed on and around it.
Mardie's book is the top photo. Winter's Tale, and it has the main pop up plus a flap with pop up's as well on each page. The silver "lake" under my thumb is the flap popup on this page. Also notice the little lit up house.
Thank you Janet and Colin for these gifts!
Tuesday, December 26, 2006
Monday, December 25, 2006
Merry Christmas
This is really weird. Blogger is super fast. . . I already did this post though and it's lost in cyber space.
This is a gift from my sis for Christmas! We had dinner at her home for Christmas Eve and exchanged gifts since they have other plans for Christmas day!
She gave me a sock extravaganza, knitted me a scarf, and made a beaded pin for me! I'm very excited to delve into these new yarns and use my new needles!
Thanks Janet!
Thursday, December 14, 2006
Yeha Picasa's alive!
I was really beginning to freak out. I couldn't connect to BB or anything. Luckily whatever was awry it's resolved after a reboot!
Here's my third cover from the fabric Jo gave me today. Thanks Jo! This cover has so many colors I LOVE to wear, the merlot, plum, sage, and rust. Plus I love the patchy look and geometric quality too. Since it's upholstery fabric it's very sturdy and durable, yet there are chenille threads woven throughout to create the design so it has softness as well.
This handbag and it's covers are just too fun! It's neat to be able to have choices as to what look I want to have in my purse with just slipping on a new cover! Since I'm not a very fussy person I am actually having more fun making the covers than I will ever have carring them! It's neat to see how the bag looks completely different with this simple change.
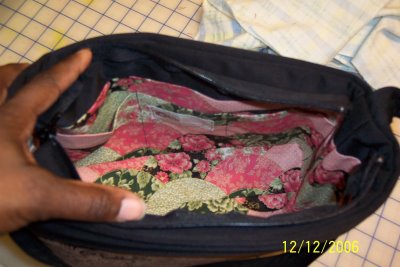
For all of the purses I've made I finally got it right on the interior pockets too. This is the most pockets I've put into a purse. But now all of the little things I have don't get lost. I have had some little pouches in the past for little things in my purse and those were great to contain things, cute and special to me since they were handmade by people that I care deeply for, but utimately they added weight and I had to get them open to use the contents. With the pockets inside this bag I just have to sort things as I put them back into my purse into the correct pocket and it's ready for me when I need it!
I need to post, I need to post!
I performed an upgrade on Picasa the software I use to post photos and now I cannot post to blogger. I don't know if that's due to Blogger Beta, as I know of at least one other blogger that is having problems with Beta, or if the upgrade is at fault. All I know is that I have this cover that I want to post and I can't.
Jo gave me some fabrics today, she's so sweet! So when I got home while the boy's were napping I whipped up a cover. It's upholstery fabric and very pretty. I just wish I could post it. . .
Stitch Sampler Grace Smarthandbag cover
The maker of this pattern used her Pfaff Creative sewing machine to demonstrate stitch sampling on both the Grace and Eliza Jane bags on her site. I really fell in love with the colors and uniqueness of those bags. When I got my pattern I emailed her and asked her how she created this technique as well as one other. She explained how she created the look.
I didn't want patchwork like her bags though so I decided to make my stitch sampler cover with stripes. I used a different color embroidery thread and different stitch pattern for each line.
I wanted to use the monograming feature as well so I picked scriptures that mean something to me to write out.
This side has Proverbs 3:5-6 "Trust in the Lord with all your heart lean not on your own understanding, in all your ways acknowledge Him and He will direct your path."
I am in love with this cover. I had a lot of fun making it. Stitching out 29 rows of decorative stitches does take time though. . . hours of time. The actual construction of the cover once the stitching is complete takes only about 15 minutes though. When I started this one I was wanting to embroider a cover and couldn't settle on an embroidery pattern. I'm happy I made this one instead for now!
Side 2 of the Stitch Sampler cover. The scripture on this side is from Proverbs 31:13 - "She finds wool and flax and works with eager hands."
Wednesday, December 13, 2006
My Grace Smarthandbag
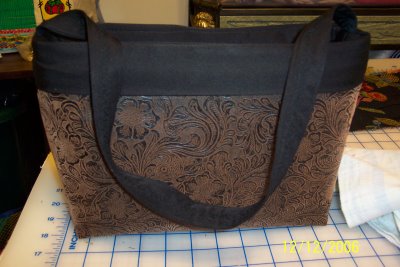
I loved my mommy's bag so much I needed to make one for me. I was going to make it black just like hers, but after thinking about most of the colors I wear I decided to use brown. This is a twill brown fabric with a silver thread in it so it's almost shiny, but not really. It has a unique appearance. It goes well with most of the colors I wear so though I was thinking of making several base bags and then covers for various occassions I may just need this one, or maybe one other.
This pattern is really fun to make. The covers are even more fun. I have some ideas for covers and cannot wait to get some more time to put them together. The covers are very quick and easy to construct so I don't mind spending a little more time if needed to embelish them. My mom's covers so far all go with my bag and vice versa so that may be another neat factor, we can swap covers with eachother!
Tuesday, December 12, 2006
Mommy's new Grace Smart Handbag
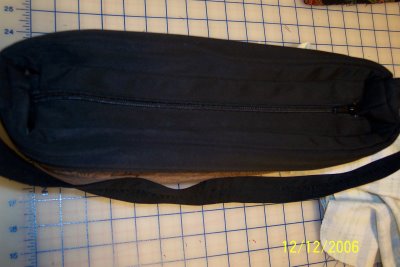
I know it's hard to see in black on black, but here is my Mommy's new bag that I just started and completed earlier this afternoon. I recently found a pattern for a purse called the Grace Smart handbag designed by Georgia at www.thesmarthandbag.com. I loved the concept. I had a bag that allowed you to change the cover like this maybe 10 years ago called the Susan Briganti Push Up bag. I had a size A, my mom a B, and my sis a C. I had two covers for it but sometime last year I sold it and the covers. They stopped making them and they were rather on the expensive side so I couldn't afford as many cover choices as I would have liked anyway. Also, way back, maybe when I was 10 yrs. old after they were cool I inherited a Bermuda bag with wooden handles and 2 button on covers from my sister but I don't remember what happened to it. It's long gone.
Basically this bag unlike the two mentioned above is a stand alone handbag. It's features are a zipper closure lining and organizer pockets inside. Like the others you can change the exterior easily. The neat thing about this one to me is that I can MAKE different covers to match the mood, occasion, outfit, etc. The pattern can be sewn as written or revised for your own needs. I for example changed the handles that the original pattern called for and made a singel strap from the same fabric as the bag because that's what I knew my mommy wanted. I also used a firm fuseable interfacing product like peltex, vs. the fleece and interfacing the pattern called for. I wanted the bag to stand on it's own easily like most ready made bags.
Anyway this is the basic bag, but if you scroll down through my next few posts you can see that I made a few covers for it. The pictures with the covers show more detail since they are not black on black. I want to embroider a cover but haven't gotten that far yet. I believe I also want to quilt a cover. But for now I have made 2 covers from interesting fabrics vs. embelishing them. My mommy like me isn't a terribly fussy lady so I don't think she will be really interested in super elaborate covers.
I will be making one for myself soon for my new handbag. I like the pattern, it was very easy for me to figure out after reading through it and looking through a few photos of completed bags online at various sources. There are quite a few steps to complete it but from the other handbag patterns that I've purchased and made it the past I think that just contributes to this being a well made handbag.
There were two times, both on the first cover's construction and both where I didn't read the instructions exactly as written where I had to redo a step or two, but both times it was easily correctable. The size is very nice too. I'm glad I didn't get the bigger bag pattern, Eliza Jane, that is offered. It would have been too big for my needs! I may however take the idea and make a tote bag. Stay tuned to find out!
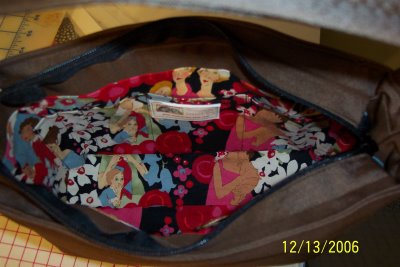
Here's a shot of the lining. I sewed four different sized pockets inside. One is the size of a pen. The others range from cel phone sized to small wallet sized. This fabric is a pretty pink, green, and black print my mommy chose a few months back for something else. I had some left over and figured if she liked it then I probably couldn't go wrong now and it makes the inside of the bag sunny yet it's a print so it should help to hide any marks or smaller stains.
Sunday, December 10, 2006
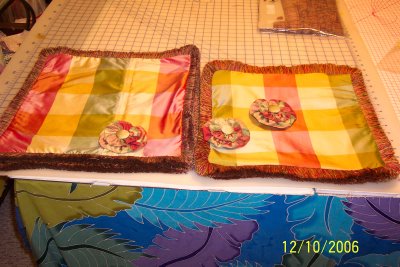
4 Pillows, 3 Medallions, 1 Explosion, 1 Fire
Here's my finished latest job. I finished up the pillows a little while ago, the medallions I made Thursday night and Friday day.
The medallions were supposed to be rosettes but the fabric was heavy and it was difficult to get it to lay flat and be this size so after 3 failed rosette attempts I made these yoyo medallions instead. This is where I get to tell you about the explosion and fire!
I had actually finished up the first one and had taken a picture to send to Jo to get her approval seeing as how I made something completely different from what was originally requested. I was emailing her on the laptop in this room when suddenly I heard a loud noise and looked up in time to see my glue gun shoot sparks, burst into flames and then burn up. It hadn't been plugged in very long so I'm not sure exactly what happened. I'm just glad it didn't happen when my hand was on it, or when I was closer to it, or when I was out of the room. . . I could go on, you get the point. Praise God nobody and nothing was damaged or really lost other than the stupid glue gun.
The pillows I worked on yesterday, today and tonight. They are silk and I really liked the fabric. . . that is until I worked with it. It's so HARD to work with! It's lighter weight than most of the other decorator fabrics I've had so far so it had some interesting challenges. Like it wanted to pucker up when the fringe was being added, and any pin or needle hole made a mark. None-the-less I finally finished them up. And the hardest part for me was cutting it all in the first place. I don't have a ton of experience with matching plaids so I ran into some challenges when it was time to cut the pillows. I didn't give enough thought to matching and centering the pillow faces before my first few cuts. That resulted in loss of fabric and I had to really be thoughful and creative to get the rest of the pieces cut from my remainder. I still barely had enough fabric. In fact I almost had a serger disaster with one pillow but thankfully I was able to finish with just scraps to spare.
The two on the left are meant to be larger and have different trim. The one on top is upside down to illustrate my first zipper closures in pillows that I'm quite proud of I must say. The two on the right are 2 inches smaller and showing the face of the pillow.
I really do love this job, because even though this was a tough project all around to get through, it was still fun, challenging and I was motivated to get er done!
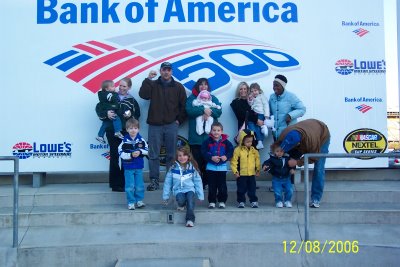
Lowes Motor Speedway Tour
Our MOPS group had a tour at Lowes Motor Speedway on Friday. Rocky was able to get home early enough so he joined us. Here we are in Victory Circle!
It was neat to see the inside of the Speedway and learn some of the interesting facts about the history of this place. I've lived most of my life less than 10 miles away and this was all new to me.
With my Ray boys loving anything related to cars and going fast this was pretty fun for them too! We got to make a loop around the track, and have the areas both inside and outside of the track explained.
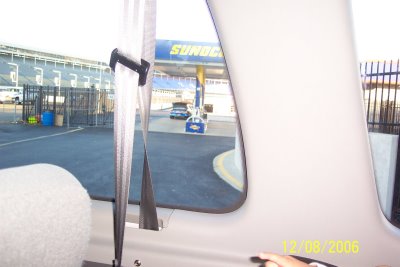
It was really really really cold so though it was crowded in the back of the van we were touring in, I was glad to get back in after this picture.
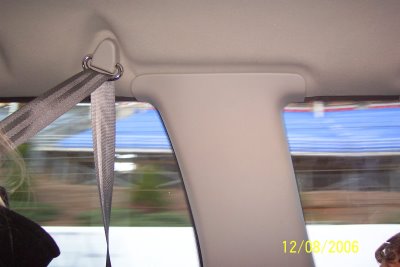
You may think from the wonky angle that I just got squished in the back as the 15th passenger . . . but the true reason why this picture looks like this is that we are on the raceway track almost still at one of the ends. We were so high up in the air, and at this very steep angle. It was unnerving to most of the passengers to be tilted like this. On the left hand side you can see out the window down to the grass and the part of the track that is visible from my limited line of view.
Subscribe to:
Posts (Atom)