Tuesday, April 10, 2012
First Vacation
We just got back from the Lake for our first vacation of 2012! We had a blast last week and can't wait to get back. Check out what we did on our RVing blog!


Friday, March 23, 2012
Sewing School
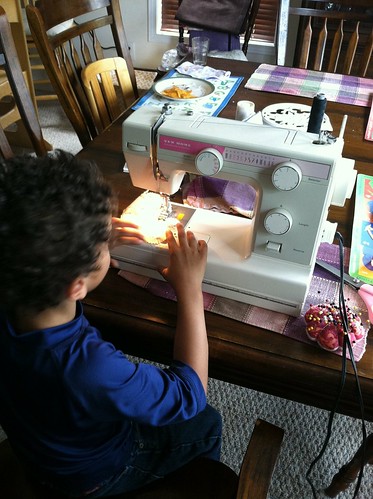
The kids have expressed interest in sewing, and I have interest in teaching them. Today I got my old sewing machine from my mom's house. I felt that starting on a basic mechanical machine would give them proper fundamentals of machine mechanics and maintenance.
They all had turns to sew some samples. Then Zuri wanted to sew a heart and Mardie wanted to make a dragon.
Zuri's project was pretty easy. Cut out a heart and stitch it up, turn and topstitch.
Mardie's involved making a pattern, coloring, ironing and lots of curves and angles. He did great though and even whipstitched the opening closed by hand after he stuffed his dragon.
I think we are going to have a lot of fun with sewing. I need to find some basic clothing patterns for shorts and pajamas that have multi sizing so they can experiment with making some clothes.
Thanks mommy for letting us use the machine :)
Thursday, March 15, 2012
Coaching Upward Cheerleading
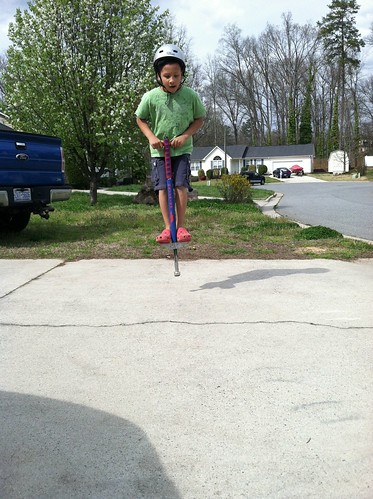
Well our Upward season is over, and I have had a blessed time coaching my 9 girls through it. I have seen them all, and myself grow. I have made some special friends with my Assistant coach and Team Mom. And to top it all off, I got through it! It was't easy. At times I was certain I would fail. I kept getting encouragement from Rocky and the parents.
At the end of the season, I made them each a bracelet, with their name, and a cheer, cross, and "made with love" charm to encourage them to remember our year, our devotions and whose they are!
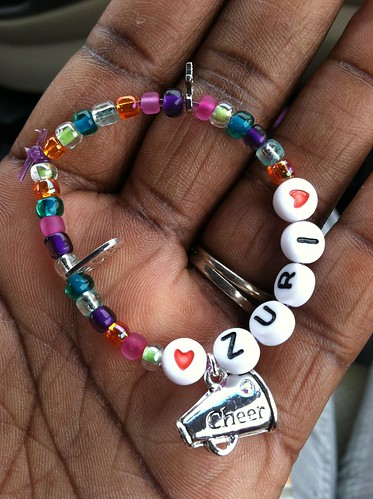
At the end of the season, I made them each a bracelet, with their name, and a cheer, cross, and "made with love" charm to encourage them to remember our year, our devotions and whose they are!
Sunday, January 22, 2012
Balle's scarf
Zuri's first knitting project. I cast on 5 st in RYC Cashsoft leftover from a beanie I made in her first year. I let her hold her hands on the needles under mine and verbally repeat the steps as we worked the stitches together. It's about 10" long and now Balle's neck is nice and warm!

Balle gets a new bag (and outfit)
Zuri got a few fiber art lessons today. Zuri received a Corolle Les Cheries Doll named Chloe Ballerina that she affectionately named Balle for her birthday. She sat with me and knit about 4 rows on a scarf for Balle. I will have to upload the scarf pics later, they are on my phone vs. camera.
Here's the bag and outfit that we made for Balle. Zuri helped with the design of the purse, she centered the design and pushed start (my sewing machine will allow hands free/presser foot free sewing) to sew out the design "Balle ♥♥♥". She did an excellent job!
She got disinterested though when I had to press and sew the tiny binding. It wasn't the type of work suitable for tiny princess fingers. :(
The outfit is made from 2 socks. I bought a TON of socks and made Z legwarmers before she was born. I planned to also sell some, never got around to it and have a ton unsewn and decided to copy an idea I saw on flickr to make them into doll clothes. They work perfectly. Sewing is reduced because they are already tubes so unless you want to, there is no need for side seams. They are stretchy so they are easy on and off for small fingers. No frustration that the clothes are stuck on or off. No complicated closures to manipulate.
For the leggins, I measured and cut the tube leaving the cuff of the sock as the waist band. Then edge stitched with a stretch stitch the entire bottom. Then I straight stitched up and around and down to form the legs. I sewed 1/4" on either side of center and marked which stripe to stop at based on laying Balle on the tube before sewing. Once sewn, I cut between the stitches leaving a 1/4" seam allowance. Voila, leggins!
For the tunic top, I cut out the focal bunny in a tube and sewed the bottom, stretching slightly to allow it to lettuce edge. I set aside the bunny tube.
Then I cut the 2nd sock below the bottom stripe, leaving the cuff in tact to form the neck edging. I edged the bottom with stretch stitch then cut the tube in two. leaving two rectangles (because these were stripes, I aligned the "jog" of the beginning of the stripes up to be where I cut so that it would be in the seam allowance.
Then I carefully pinned the sleeves to the bunny tube and first sewed the front, centering the cuffs on either side of the center of the tube. Then flipped and repeated the back, ensuring that the stripes matched. Then I turned it inside out and sewed the bottom of the sleeve seams, and turned it right side out.
These were WAY faster than any other doll clothes I've attempted in the past. I believe I will go back through some of the leg warmers that Z doesn't wear that much (she actually still wears quite a few of them) and harvest some for doll clothes for Balle.
I can also see a use for older tights that have gotten a hole, both mine and hers, making doll leggins!
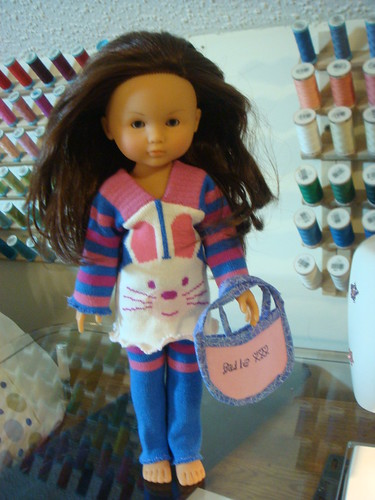
Here's the bag and outfit that we made for Balle. Zuri helped with the design of the purse, she centered the design and pushed start (my sewing machine will allow hands free/presser foot free sewing) to sew out the design "Balle ♥♥♥". She did an excellent job!
She got disinterested though when I had to press and sew the tiny binding. It wasn't the type of work suitable for tiny princess fingers. :(
The outfit is made from 2 socks. I bought a TON of socks and made Z legwarmers before she was born. I planned to also sell some, never got around to it and have a ton unsewn and decided to copy an idea I saw on flickr to make them into doll clothes. They work perfectly. Sewing is reduced because they are already tubes so unless you want to, there is no need for side seams. They are stretchy so they are easy on and off for small fingers. No frustration that the clothes are stuck on or off. No complicated closures to manipulate.
For the leggins, I measured and cut the tube leaving the cuff of the sock as the waist band. Then edge stitched with a stretch stitch the entire bottom. Then I straight stitched up and around and down to form the legs. I sewed 1/4" on either side of center and marked which stripe to stop at based on laying Balle on the tube before sewing. Once sewn, I cut between the stitches leaving a 1/4" seam allowance. Voila, leggins!
For the tunic top, I cut out the focal bunny in a tube and sewed the bottom, stretching slightly to allow it to lettuce edge. I set aside the bunny tube.
Then I cut the 2nd sock below the bottom stripe, leaving the cuff in tact to form the neck edging. I edged the bottom with stretch stitch then cut the tube in two. leaving two rectangles (because these were stripes, I aligned the "jog" of the beginning of the stripes up to be where I cut so that it would be in the seam allowance.
Then I carefully pinned the sleeves to the bunny tube and first sewed the front, centering the cuffs on either side of the center of the tube. Then flipped and repeated the back, ensuring that the stripes matched. Then I turned it inside out and sewed the bottom of the sleeve seams, and turned it right side out.
These were WAY faster than any other doll clothes I've attempted in the past. I believe I will go back through some of the leg warmers that Z doesn't wear that much (she actually still wears quite a few of them) and harvest some for doll clothes for Balle.
I can also see a use for older tights that have gotten a hole, both mine and hers, making doll leggins!
Friday, January 20, 2012
2012 slippers
Each year I end up knitting a new pair of slippers. The previous year's pair wears out and I crave a new style. For 2012 I chose to knit Malabrigo Loafers bu Coco Knits. I was able to knit them in an evening of Netflix shows. They required exactly one skein of Malabrigo Chunky for the size small.
I need to locate or make some soles to add tread, and keep them from wearing out so quickly. I also need to weave in the ends.
It's hard to tell from the picture, but they are a medium bluish purple.
I haven't decided whether or not I am going to add any further embellishment. There's something about their simplicity that I like at the moment.
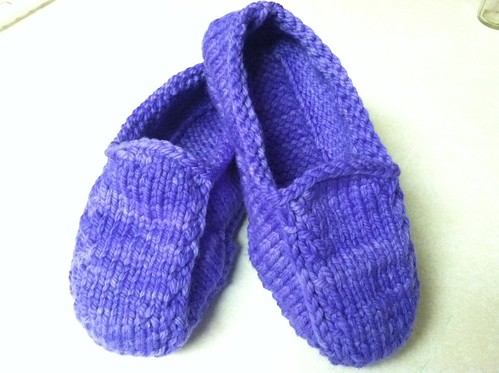
I need to locate or make some soles to add tread, and keep them from wearing out so quickly. I also need to weave in the ends.
It's hard to tell from the picture, but they are a medium bluish purple.
I haven't decided whether or not I am going to add any further embellishment. There's something about their simplicity that I like at the moment.
Thursday, January 19, 2012
iBuds
I have historically had the hardest time with in the ear and over the ear headphones. They don't like my anatomy. They fall out or off in a very short time. Even bluetooth devices. It's been much to my consternation because I would love to listen to books or music sometimes just by myself, but I haven't been able to find a solution.
Jenny, my knitting buddy, mentioned how the iPhone standard ear buds worked sufficiently for her so I decided to go home and resurrect mine, sealed in my iPhone box and give them a try. Would you know, they stayed in!
I just had to deal with the 2nd reason why I don't get along with most of these types of gadgets. Tangles.
I had seen icorded headphones on Ravelry, as a solution so I decided that if I was going to be carrying mine around, they needed sleeves.
A few Netflix selections and scrap sock yarn knitting later and voila! iBuds!
The final solution needed was how to transport them in my bag without damage, and how to easily locate them. There's nothing like deciding you need something and not being able to find it!
Here's where the Tom Bihn Mini Cordura Organizer Pouch in Wasabi comes in. Looking at it, it's not anything super special, but these little pouches, and their friends are now the mainstay of the organization and upkeep of my Every Day Carry bag!
When I purchased my first TB bag, these Organizer Pouches came highly recommended. I didn't get it though. It took ordering a few and playing around with them to find out their secret.
They come in 6 fabrics, Cork, Ballistic, Cordura, Clear front Cordura, Dyneema ripstop and Padded. They come in 7 sizes, mini, small, pencil, medium, super drive, large and now Kindle. The color choices are dependent on what TB has on hand, but usually range the gamut of colors available in their bags.
I currently use in my EDC mini sizes in Cork, Iberian Dyneema, Azalea and now the Wasabi Cordura. In small size, Ultraviolet Dyneema and a special gift to forum members a Friend of Tom pouch. The pouches are flat construction and the fabrics light weight so they don't take up significant room or weight, but they add an immeasurable amount of organization to my bag. They are like pockets, but each one a different size/fabric combination so it's SO EASY to find anything in my bag. It's also easy to find out if I've put something in that doesn't belong. It's NOT in an Organizer Pouch.
Lastly the clip keeps them secure, and easy to find whether clipped to an internal o-ring in my bag, or a keystrap, they don't fall out or get accidentally left out and lost, and they don't settle into the bottom of the black hole in my bag.
They also are useful in travel or in children's bags for corralling those little things that seem to go missing into corners or under the bottom of the bulky stuff. They are useful by themselves as a grab and go pouch for anything from medicine pouch to a place to keep books from getting dogeared in your bag. And that's one more thing that I love about them. Since I've started using them, my contents are protected and remain looking nicer because they aren't being beat up floating in my bag.
So if you couldn't tell, I love TB organizer Pouches. They are fun little accessories, that make a huge impact in the organization of my life, and more specifically my bags. :)
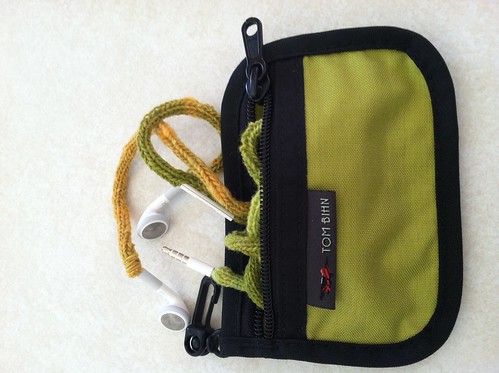
Jenny, my knitting buddy, mentioned how the iPhone standard ear buds worked sufficiently for her so I decided to go home and resurrect mine, sealed in my iPhone box and give them a try. Would you know, they stayed in!
I just had to deal with the 2nd reason why I don't get along with most of these types of gadgets. Tangles.
I had seen icorded headphones on Ravelry, as a solution so I decided that if I was going to be carrying mine around, they needed sleeves.
A few Netflix selections and scrap sock yarn knitting later and voila! iBuds!
The final solution needed was how to transport them in my bag without damage, and how to easily locate them. There's nothing like deciding you need something and not being able to find it!
Here's where the Tom Bihn Mini Cordura Organizer Pouch in Wasabi comes in. Looking at it, it's not anything super special, but these little pouches, and their friends are now the mainstay of the organization and upkeep of my Every Day Carry bag!
When I purchased my first TB bag, these Organizer Pouches came highly recommended. I didn't get it though. It took ordering a few and playing around with them to find out their secret.
They come in 6 fabrics, Cork, Ballistic, Cordura, Clear front Cordura, Dyneema ripstop and Padded. They come in 7 sizes, mini, small, pencil, medium, super drive, large and now Kindle. The color choices are dependent on what TB has on hand, but usually range the gamut of colors available in their bags.
I currently use in my EDC mini sizes in Cork, Iberian Dyneema, Azalea and now the Wasabi Cordura. In small size, Ultraviolet Dyneema and a special gift to forum members a Friend of Tom pouch. The pouches are flat construction and the fabrics light weight so they don't take up significant room or weight, but they add an immeasurable amount of organization to my bag. They are like pockets, but each one a different size/fabric combination so it's SO EASY to find anything in my bag. It's also easy to find out if I've put something in that doesn't belong. It's NOT in an Organizer Pouch.
Lastly the clip keeps them secure, and easy to find whether clipped to an internal o-ring in my bag, or a keystrap, they don't fall out or get accidentally left out and lost, and they don't settle into the bottom of the black hole in my bag.
They also are useful in travel or in children's bags for corralling those little things that seem to go missing into corners or under the bottom of the bulky stuff. They are useful by themselves as a grab and go pouch for anything from medicine pouch to a place to keep books from getting dogeared in your bag. And that's one more thing that I love about them. Since I've started using them, my contents are protected and remain looking nicer because they aren't being beat up floating in my bag.
So if you couldn't tell, I love TB organizer Pouches. They are fun little accessories, that make a huge impact in the organization of my life, and more specifically my bags. :)
Wednesday, January 18, 2012
Boy's room redo
Our 2011 Christmas plans needed to coincide with the house goals of continuing to reduce clutter. That kind of sounds contradictory. Christmas presents in most cases equal clutter, but I was against that on multiple fronts. So I had some discussions with Rocky and we decided that part of the boy's present would be something to help their room be more usable. Rocky's parents asked what to do for the boys and I told them our plans, they asked if they could participate in them and it could be a combined gift. We conceded, it made sense.
So the day before Christmas Rocky and his father undertook a project to turn the boy's bunk beds that have been stacked down into loft beds. The beds aren't anything fancy, I actually found them years ago at a Habitat For Humanity Restore for $25. We purchased new pillow top mattresses for them (they are super comfy to sleep in). and the boys had what they needed. The dilemma was that a few months ago our bonus room became a dedicated home school and was no longer available as a playroom. We also needed to un-stack the bunks for some other issues we had. The result was that they had their beds and toys all in their room with little room to play or move around. The loft beds gave them back their floor for playing and the beds for sleeping are up and out of the way.
Rocky and his dad built the loft structure and stabilizing supports under the beds. Then in the following weeks Rocky has been constructing the additional shelves and finishing touches to make the space usable.

The train table for building, setting up vignettes, etc. fits nicely under Mardie's bed. Rocky has put in two upper shelves, there will be one more that goes the length of the bed, under the "LEGO" display shelf for Mardie's special things. There is an open backed shelf in front of the window and under it a very sturdy shelf that is also a window seat. Under that shelf the LEGO's are in individual bins by color with two larger tubs for builds-in-progress. LEGO manuals are in page protectors in binders. Now the boys can build to easier because finding the parts is facilitated by them being separated out. They have been careful to maintain the separation, and they do not dump out the bins (that's a big no no in our household due to my AR tendencies).
In the under Train Table bins the boys keep their action figures/vehicles on one side and "weapons" on the other. Weapons are in the Nerf variety for the most part, but there are a few pop gun pistols etc. in the mix. These items used to be in under the bed storage bins. You can imagine how messy the under the bed spaces would become with time. It was a cleaning nightmare. Now it is very easy to see where everything goes and to put it away. It's also easy to see when things are out of place.
The boys had an IKEA Kusk cabinet in their room before that had come from Zuri's room, but it is no longer needed in their room due to the shelves that Rocky built in under the lofts. I will show where we put it when I blog about Zuri's room again.

Under Charmie's bed Rocky built a bookcase. In it the boys house most of their books. There is some overflow into our living room bookcases. The bookcases mirror the structure of the beds so they aren't super deep, but as the boys grow, their books get smaller and the smaller sized books fit just fine. We moved these floor chairs in so they have a sitting area as well. They use them to sit in when they read, they also pull them up to the train table when they are playing and use them when they are playing board games too.

In the first photo you can see a yaffa block stacker in between the beds. This was also reused from Zuri's room, and I have had it since college. Yes, I know it's not the prettiest or nicest, but it's functional for their needs. Their lamp, alarm clock, and bins of dress up costumes are housed here. A common bin for hats and accessories and each has their own personal bin for their costumes.
The boys report that they love their new room. I love their new room! With time we have to decide how to finish the beds. The wood is stained on the uppers and unfinished on the lower parts. It works for now, though with time a uniform finish would be nice.
Also the design can be undone. The beds can be unstacked and turned into individual twin beds or bunks whenever we choose!
This was the perfect solution for a large part of their Christmas, and also keeping in line with our new house goals of cutting the clutter!

Friday, January 13, 2012
2011 recap

I know it's a little late into the New Year. I had to decided to do this, and then I had to get a little help from a friend to remember how to do this. But here are some high points from 2011. I had a hard time picking just these 36 pictures. There were many many more that I wanted to include, but the mosiac maker would only allow 36 tiles. Enjoy, I know I did, looking back through images from the past year. 1. Side view, 2. DSC09149, 3. DSC09178, 4. DSC09181, 5. DSC09276, 6. DSC09295, 7. DSC09315, 8. DSC09342, 9. My little Princess, 10. DSC09378, 11. closed with swifts, 12. DSC09505, 13. Navajo ply on Vespera, 14. Avion mine, 15. We need kickstands, 16. Untitled, 17. Visit to Tom Bihn, 18. My sweet precious nephew, 19. DSC09813, 20. Apple chips, yum!, 21. Untitled, 22. Ham the rescue dog, 23. Camper and mini camper, 24. No more spider man, 25. The rough section, 26. Studio and School preview, 27. Untitled, 28. Beach ride, 29. Untitled, 30. Untitled, 31. Untitled, 32. Lunabudknit art batt spun wild, 33. Untitled, 34. New favorite spinning basket!, 35. Untitled, 36. First ride
Thursday, December 08, 2011
The decluttering continues
I've had some issues with my kitchen since I moved in. I don't know what the designer was thinking when he or she planned my kitchen but it wasn't designed for real people who actually cook. I am still thankful for my kitchen, I have experienced some more poorly designed than mine, but it has some areas that are lacking. For one, most of the cabinets are not large enough to house pots and pans or any counter top appliances. Smaller things like plates, cups, cookbooks, etc. fit just fine, but anything on the largish side is impossible to get in or out without major twisting and shouting.
Thankfully I have a decent sized pantry, which up until today I had poorly arranged and under maximized.
A friend, Katy, mentioned a blog on organization that I checked out: www.iheartorganizing.blogspot.com and I have spent some time going though her posts. I admire her decorating sense (though I don't have a speck of it in me) and her creativity (I would like to grow in this department). She also has 3 children and a modest home.
I gleaned some ideas and concepts from many of her "redo" posts.
1. Empty space to analyze it.
2. Sort what was pulled from space into keep and pitch piles.
3. Decide how to use the space the best for your needs, even if it means something unconventional or different from what you were originally thinking. Keep an open mind.
4. Shop your home for containers and methods to better organize the space
5. Put together the new space.
6. Bask in the joy of your accomplishment.
Well earlier this week I did this in my kitchen cabinets and ended up with a huge bag to donate, some things not worth donating that needed to be thrown away, and an appliance garage!!! I also was able to group like things together more than before so the flow and ease of use is improved in the entire kitchen.
So now my counter tops have just the toaster as far as appliances are concerned. I will be taking an updated picture of the kitchen showing the counters soon, but not today :)
These changes got me thinking of how I could maximize some other spaces. I have two pantries in my kitchen, the food pantry and another one that holds all kinds of things from vacuums to trash bags. It started out as a closet under the stairs and has the hot water heater in it. A few years ago Rocky put some shelving in there and now I can put in many more things.
When I tackled the food pantry today my goal was to be able to get my stainless pots and pans into it so that I could eliminate the over the sink potrack that I thought I needed but HATED!
Lookie!
I did it! (and for those who don't believe me check this out!)
Not only did I do it, but I love how the pantry is now organized. It looks clean, things are easy to find and get to and there is plenty of room for grocery day!
One of the tips that I found on Jen's site that I tried was removing things from their packaging and putting them into baskets or Tupperware. It did end up giving me more room. It makes my pantry feel cleaner and more unified as well to have like containers.
And all of this was what I already had on hand! ♥♥♥
I will be doing some other projects around my home, finding areas that I have neglected and tackling them to make them work better for our family, stay tuned!
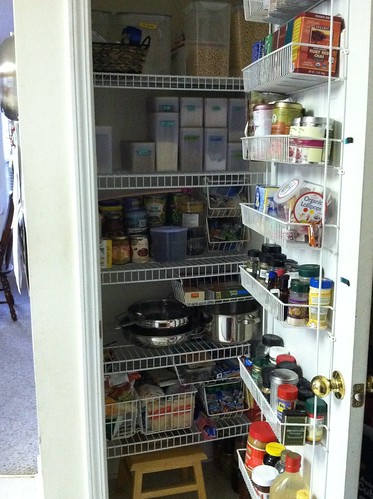
Thankfully I have a decent sized pantry, which up until today I had poorly arranged and under maximized.
A friend, Katy, mentioned a blog on organization that I checked out: www.iheartorganizing.blogspot.com and I have spent some time going though her posts. I admire her decorating sense (though I don't have a speck of it in me) and her creativity (I would like to grow in this department). She also has 3 children and a modest home.
I gleaned some ideas and concepts from many of her "redo" posts.
1. Empty space to analyze it.
2. Sort what was pulled from space into keep and pitch piles.
3. Decide how to use the space the best for your needs, even if it means something unconventional or different from what you were originally thinking. Keep an open mind.
4. Shop your home for containers and methods to better organize the space
5. Put together the new space.
6. Bask in the joy of your accomplishment.
Well earlier this week I did this in my kitchen cabinets and ended up with a huge bag to donate, some things not worth donating that needed to be thrown away, and an appliance garage!!! I also was able to group like things together more than before so the flow and ease of use is improved in the entire kitchen.
So now my counter tops have just the toaster as far as appliances are concerned. I will be taking an updated picture of the kitchen showing the counters soon, but not today :)
These changes got me thinking of how I could maximize some other spaces. I have two pantries in my kitchen, the food pantry and another one that holds all kinds of things from vacuums to trash bags. It started out as a closet under the stairs and has the hot water heater in it. A few years ago Rocky put some shelving in there and now I can put in many more things.
When I tackled the food pantry today my goal was to be able to get my stainless pots and pans into it so that I could eliminate the over the sink potrack that I thought I needed but HATED!
Lookie!
I did it! (and for those who don't believe me check this out!)
Not only did I do it, but I love how the pantry is now organized. It looks clean, things are easy to find and get to and there is plenty of room for grocery day!
One of the tips that I found on Jen's site that I tried was removing things from their packaging and putting them into baskets or Tupperware. It did end up giving me more room. It makes my pantry feel cleaner and more unified as well to have like containers.
And all of this was what I already had on hand! ♥♥♥
I will be doing some other projects around my home, finding areas that I have neglected and tackling them to make them work better for our family, stay tuned!
Tuesday, November 29, 2011
Getting out the clutter and not letting it come back
So as Christmas time has rolled around again I see the typical commercialism and it's always off putting to me, but this year especially so. It bothers me that so many disposable items are marketed as must haves, and like lemmings, the masses fall right in and consume them. It makes me feel bad too that I am tempted by some of it. It's even more devastating to see that my kids are immersed in it and the gimmes have started.
In an attempt to regain control of my housekeeping I have been systematically going from room to room, area to area and decluttering. There are only a few pockets of the house that remain. Ive tried to evaluate whether or not we use, or will use the item, do we need it? Does it fit our lifestyle and goals? I've established homes for things and if there is no home for it in my home, it doesn't belong here. This is all good. It feels so relieving to not have piles of stuff around me. It feels good to know that the things that I have eliminated have been given to others to help them in their need. It feels good to be able to see surfaces clean, and free of dust and excess. So those areas are done. Now I see other parts of my life, parts where I have a home for things, but the there still exists areas of excess. I'm questioning do I need them, even if I have somewhere to store it.
So where do I go from here? I want a balance. I dont think having things is wrong if I can afford the time, money, space and stress of owning them. Possessions should not create problems of any kind. How do I continue to get the clutter out once I've gotten through the first cull? It gets harder to decide at this point what should go. Its easier to justify keeping things now, especially since they do have a home. How do I figure out what is OK to actually bring into the house once I have started this process? Unfortunately the things i have eventyally break, wear, get used up or we outgrow them. When it is time to consider replacing them, how do I decide if I even need to or not?
These are some of the questions I am working through figuring out. Now if I could just unclutter my mind.
Friday, November 25, 2011
32BHDS
After having owned this Travel Trailer for more than a year and having used it more than the other RVs combined, I can say without a doubt, I'm glad we decided last year to go ahead and buy it. The size works well for our family allowing us to feel cozy together, but to have our own spaces when needed. And all of the areas feel just as comfortable as another.
My favorite features are still the bunkhouse and the bathroom exterior entrance. But as we have used it, we have found some areas that we have chosen to upgrade and change.
We've made most of the modifications to the bunkhouse to maximize storage, usability and safety. The changes have been simple, rail here,hook there, shelves, etc. It really has made a difference in how the kids can use the space, it's more tailored for them.
We have also made changes in other areas, the bedding in the MBR from memory foam mattress topper to hand stitched mid century quilt. And in the main living area we upgraded the microwave.
As time progresses we will continue to change things to allow this to become more and more our home away from home. I've come to realize that this is a process and we will find our way as we have more time to use the TT and see how it feels when we are in it.
We feel very thankful, after having found this floor plan we thought that it was not within our range of affordability, but then Rocky happened to find this one on Craigslist. The owner wanting to make a break from RVing. The timing couldn't have been more perfect.
I hope to be able to blog of our adventures in the future, here, or on our RVing blog.
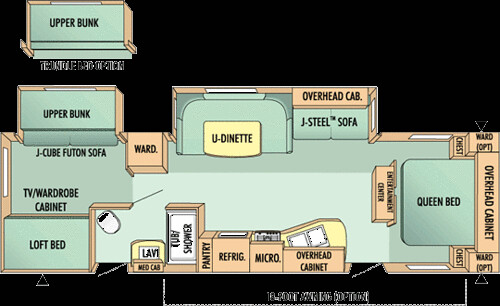
My favorite features are still the bunkhouse and the bathroom exterior entrance. But as we have used it, we have found some areas that we have chosen to upgrade and change.
We've made most of the modifications to the bunkhouse to maximize storage, usability and safety. The changes have been simple, rail here,hook there, shelves, etc. It really has made a difference in how the kids can use the space, it's more tailored for them.
We have also made changes in other areas, the bedding in the MBR from memory foam mattress topper to hand stitched mid century quilt. And in the main living area we upgraded the microwave.
As time progresses we will continue to change things to allow this to become more and more our home away from home. I've come to realize that this is a process and we will find our way as we have more time to use the TT and see how it feels when we are in it.
We feel very thankful, after having found this floor plan we thought that it was not within our range of affordability, but then Rocky happened to find this one on Craigslist. The owner wanting to make a break from RVing. The timing couldn't have been more perfect.
I hope to be able to blog of our adventures in the future, here, or on our RVing blog.
Saturday, November 12, 2011
Finally spinning again!
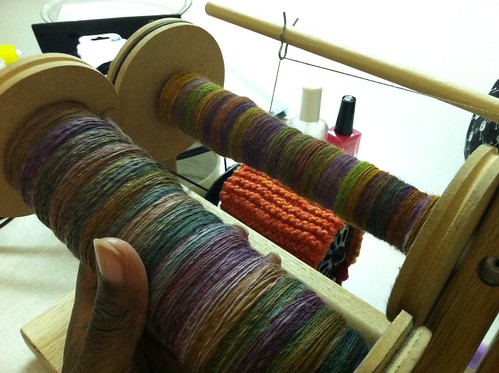
I picked up spinning yarn in 2008 after my sister introduced me to the concept via a spindle. Thankfully heavenly Handspinning made affordable spinning wheels or I wouldn't have picked up the hobby very well. I didn't get spindle spinning until about 6 months ago! I started with their single treadle wheel, the Fidelis. Some months later I had the pleasure and joy of going to meet Jan of Heavenly Handpinning in person. When I did she and her husband upgraded my Fidelis for their double treadle wheel the Bellus. I spun many lovely yards of yarn on Bellaranea (beautiful spinner). Now I have a Vespera, their espinner and a Spinolution Bee named Melina (Honey, because she spins so smooth). I haven't named or finished my Vespera yet, I got her inFebruary and honestly my life has been in such a whirlwind through getting her until now that I really haven't gotten much time with her,
She's FAST! Not that I spin super fast, but when I spin on her, she's going so fast! Her bobbins are also huge, that bobbin in my hand has 4 oz of fiber on it and it's not even close to being 1/2 full. This is only the 2nd yarn I've made on her. 33wpi for my singles. It's Polwarth from Urban Gypz that I purchased at Stitches South 2011.
Currently I'm spinning some Gale's Art Blue Face Swirl into similar singles so that I can ply them together. I had almost forgotten how much I love to spin!
Sometimes it's hard to be multi craftual because it's hard to decide which craft gets time and attention.
Saturday, November 05, 2011
The Desks are done!
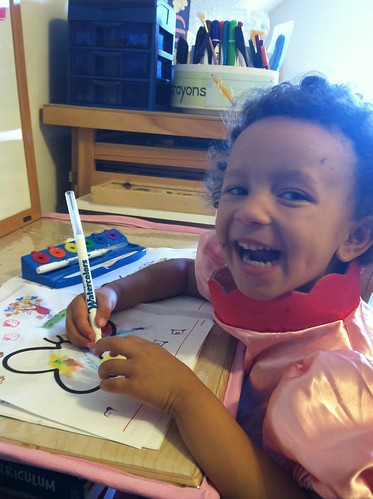
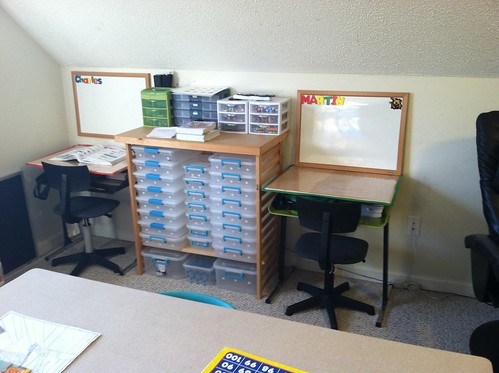
We finally have finished the desks!!! Well the tops may possibly have another step to finish them, but they are useable and I love them! Zuri decided to do some school today to try them out! I think she approves of her pink ultrasuede desk topper. Here's Zuri's desk unoccupied:
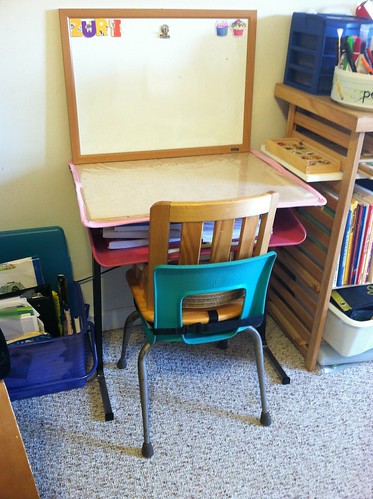
The boy's desks are also done. Here they are side by side:
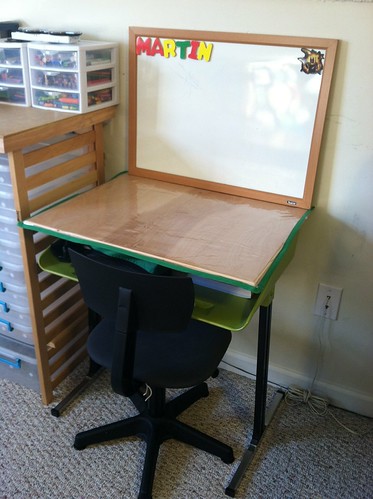
And here's a closer view of Mardie's:
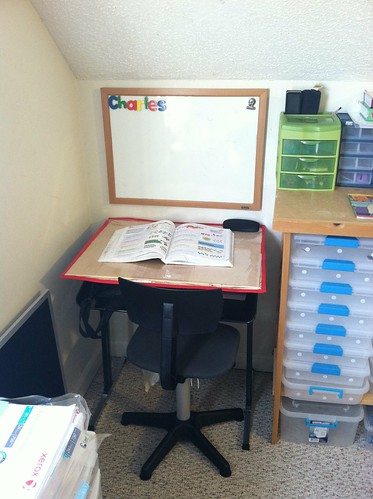
and Charmie's:
Details on the project:
After we bought the desks, clean and disassemble them.
repaint all painted surfaces
measure tops for template and discard
buy birch plywood and have cut into 24"x19" pieces at Lowes
Rocky routes the edges to round them Sand with 180 then 300 grit sandpaper all wood surfaces Reassemble desks
For the toppers since I chose to leave the wood unfinished
cut 24.25"x19.25" piece of clear urethane
cut a 24.25"x8.5" piece of fabric that for the most part is hardly seen
1 package of binding for the boys, 1" strip of ultrasuede for Z's desk
2-3.5" pieces of 1/4" elastic
turn lengthwise (long side) of fabric under twice and hem
attach walking foot to sewing machine
lay out lengthwise section of fabric on urethane
touching one edge with he hem towards the center
lay elastic in other two corners bind you will have to lift the urethane off of the sewing deck or use tissue paper as it will stick to the deck. These toppers protect the desks and are easy to clean. If I decide on a permanent solution in the future the desks tops will have been protected, and ready to go! It feels good to get the school "in order".
SAFF 2011 haul
The Southern Animal Fiber Festival in Henderson, NC is a fun annual event the third weekend in October that I like to attend. I went both for pleasure, and to help a friend with her 10 week old while she taught some classes. Little Josh was an angel, and I got my shop awn ;-}
I love the creativity, handmadeness, and experience of SAFF. It's hard to explain, so I will just say, if you get a chance, just go! I ran into some of my favorite indie dyers, but didn't really buy much in the usual vein of fiber and yarn from them. This was a first, but I'm OK with it. I have been blessed with much yarn and fiber so no need to add to the stash at this time.
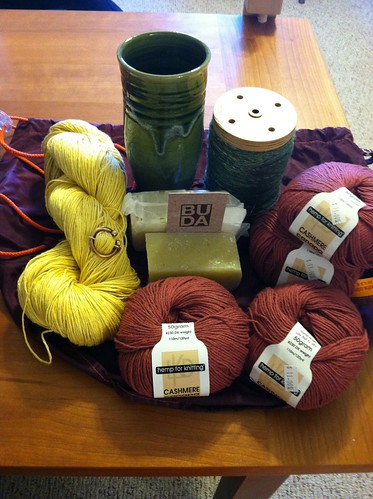
I got some things I have been wanting though:
A tumbler from Plays In Mud Studio. I love the mug I bought from her my first SAFF and decided if she was there that I must get a tumbler as well.
A handmade brass shawl pin that is low profile. Sometimes I want something small for smaller shawlettes and scarves. This one is perfect!
Shampoo and conditioner bars
and some commercially made items that I love.
Oh and not pictured, but in my flickr stream are some hand stamped ceramic buttons that have the most unusual finish.
I'm hoping next year my entire family will make the trip to SAFF and we can turn it into a camping weekend. Oh and I forgot the art batt from lunabudknits, on the bobbin above, on my wheel here as I finished spinning it up thick and thin. . .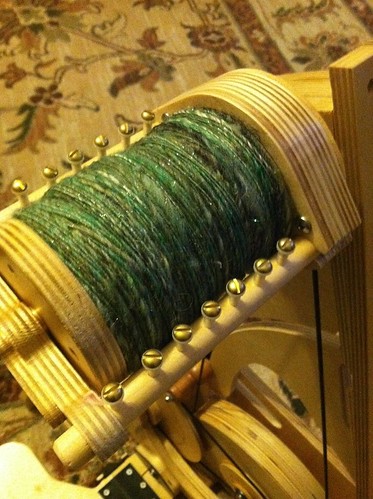
I love the creativity, handmadeness, and experience of SAFF. It's hard to explain, so I will just say, if you get a chance, just go! I ran into some of my favorite indie dyers, but didn't really buy much in the usual vein of fiber and yarn from them. This was a first, but I'm OK with it. I have been blessed with much yarn and fiber so no need to add to the stash at this time.
I got some things I have been wanting though:
A tumbler from Plays In Mud Studio. I love the mug I bought from her my first SAFF and decided if she was there that I must get a tumbler as well.
A handmade brass shawl pin that is low profile. Sometimes I want something small for smaller shawlettes and scarves. This one is perfect!
Shampoo and conditioner bars
and some commercially made items that I love.
Oh and not pictured, but in my flickr stream are some hand stamped ceramic buttons that have the most unusual finish.
I'm hoping next year my entire family will make the trip to SAFF and we can turn it into a camping weekend. Oh and I forgot the art batt from lunabudknits, on the bobbin above, on my wheel here as I finished spinning it up thick and thin. . .
Thursday, November 03, 2011
Little Z is growing!
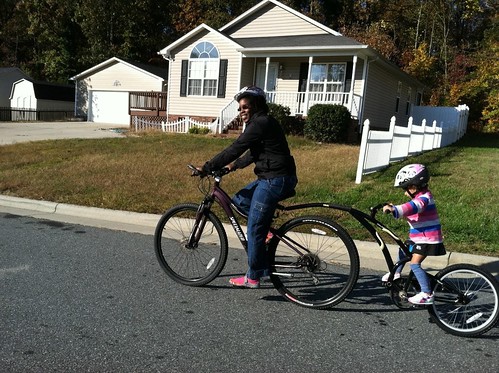
Up until this point, we have always needed a trailer for our bike rides. Zuri can finally reach the pedals on the trail-a-bike so we can attempt bike rides now with us all on saddles.
This is exciting for us all, especially Zuri! This may also open up new types of cycling adventures, though so far the trailer hasn't slowed us down too much.
This is exciting for us all, especially Zuri! This may also open up new types of cycling adventures, though so far the trailer hasn't slowed us down too much.
Wednesday, October 26, 2011
Western night
Each year the church that we do Awana through has a Western night. It is a lot of fun for the kids, and leaders alike. They encourage the kids to dress in country western wear. They take the Sparks and older groups on a hayride through local streets. Rocky and I pull the Puggles and Cubbies around on our trailer with the golf cart in the parking lot. They bring in a small petting "zoo/farm" outfit and a mechanical bull and also have a bonfire for roasting marshmallows and making s'mores.
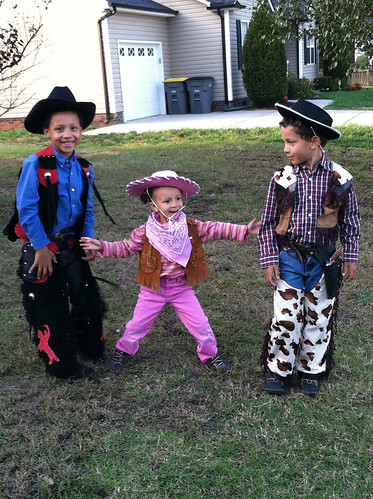
We've never dressed the kids for the night. They never had western wear. This year for his birthday Charime asked for a cowboy costume, and trips to a few local goodwill stores last night yielded Zuri's and Mardie's western effects. The kids had a blast for Western Night!
We've never dressed the kids for the night. They never had western wear. This year for his birthday Charime asked for a cowboy costume, and trips to a few local goodwill stores last night yielded Zuri's and Mardie's western effects. The kids had a blast for Western Night!
Wednesday, October 12, 2011
Camping at the Beach
Last week we went to Myrtle Beach for a little camping, the GCI Gathering in the Harvest fall conference, and to run the Children's ministry program there. We stayed at Lakewood campground for the 2nd time in as many years.
Our conference responsibilities were a lot of work as Rocky and I haven't done this before under these circumstances but it was also a lot of fun.
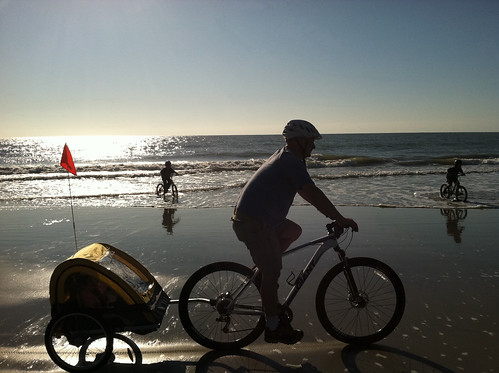
We tried to squeeze in fun with the kids. The first day we road our bikes on the beach down to the pier. The boys decided to actually ride in the ocean. It was all fun and games for them even up to their chest height until the wind started to blow and they realized they were freezing cold.
This trip was full of experiences and learning lessons for us. l learned to try to relax and go with the flow. Rocky and I learned to try to plan ahead better. Charmie learned that God can still use him, even when he makes mistakes. The boys learning to anticipate consequences of their choices.
We even reconnected with a family we met last year at the campground and really enjoyed their company. We didn't have the opportunity to exchange information when we parted last time so it was sad to think we wouldn't see each other again. Meeting up was a blessing for our families.
Each time we go camping, we want to go more and stay for longer. Too bad we couldn't stay for a few more days. . .
Our conference responsibilities were a lot of work as Rocky and I haven't done this before under these circumstances but it was also a lot of fun.
We tried to squeeze in fun with the kids. The first day we road our bikes on the beach down to the pier. The boys decided to actually ride in the ocean. It was all fun and games for them even up to their chest height until the wind started to blow and they realized they were freezing cold.
This trip was full of experiences and learning lessons for us. l learned to try to relax and go with the flow. Rocky and I learned to try to plan ahead better. Charmie learned that God can still use him, even when he makes mistakes. The boys learning to anticipate consequences of their choices.
We even reconnected with a family we met last year at the campground and really enjoyed their company. We didn't have the opportunity to exchange information when we parted last time so it was sad to think we wouldn't see each other again. Meeting up was a blessing for our families.
Each time we go camping, we want to go more and stay for longer. Too bad we couldn't stay for a few more days. . .
Subscribe to:
Posts (Atom)